Unlocking the Power of PrivateGPT: Your Local AI Assistant
Written on
Chapter 1: Introduction to PrivateGPT
In the age of advanced AI, many users find themselves reluctant to use public services like ChatGPT due to privacy concerns. The fear of personal data leaks often hinders their willingness to engage with these tools. However, the emergence of PrivateGPT provides a compelling solution for those seeking a more secure environment.

PrivateGPT allows users to keep their data secure by operating entirely offline. This innovative tool can be tailored to your specific needs, utilizing only the information you provide without ever connecting to the internet. Intrigued? The capabilities of this tool are impressive.
Section 1.1: Installation Process
Setting up PrivateGPT is straightforward, especially for Mac users with Homebrew.
- Install Git: Download it directly or use brew install git. Verify the installation with git --version.
- Install Python: Obtain it here or via brew install python, then confirm with python --version or python3 --version.
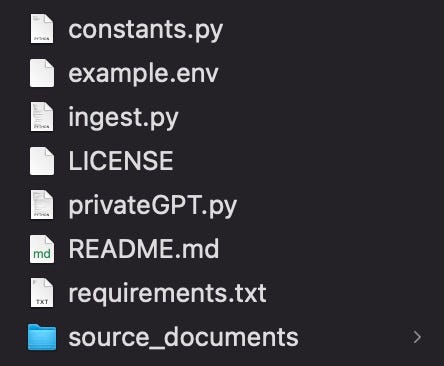
- Navigate to Directory: Change to the PrivateGPT folder with cd privateGPT.
- Rename Configuration File: Change example.env to .env using mv example.env .env (Mac) or ren example.env .env (Windows).
The configuration file includes essential settings such as your model type and path.

- Install Required Packages: Use pip install -r requirements.txt to install necessary Python packages.
- Download the LLM Model: Acquire the ggml-gpt4all-j-v1.3-groovy.bin file, which is vital for PrivateGPT's functionality.
- Move the Model File: Place the LLM file into a new folder named “models” within the PrivateGPT directory.
With installation complete, you're ready to start training PrivateGPT with your own data.
Section 1.2: Supported Data Formats
PrivateGPT can process various file types, including:
- .csv: CSV files
- .docx: Word documents
- .pdf: PDF files
- .txt: Plain text files
To train your model, simply copy your documents into the source_documents folder.
The first video provides an in-depth look at how to effectively use PrivateGPT with various document types.
Section 1.3: Data Ingestion and Querying
Once your documents are in place, initiate the ingestion process using python ingest.py. This step transforms your raw data into a format that PrivateGPT can quickly query. Depending on document size, this may take some time.
After ingestion, run python privateGPT.py to start querying your documents. You can ask questions about the content you’ve uploaded, and PrivateGPT will provide answers based on the information it has processed.
The second video highlights the privacy features of PrivateGPT and how it operates without any data leaks, ensuring a completely free and private experience.
Chapter 2: Practical Applications
PrivateGPT opens up numerous possibilities for users, including:
- Summarizing Books: Upload eBooks in supported formats and ask PrivateGPT to summarize chapters or discuss themes.
- Interpreting Insurance Policies: Instead of navigating lengthy terms and conditions, upload policy documents and clarify your doubts with PrivateGPT.
In summary, PrivateGPT represents a significant step forward in localized AI technology, offering both privacy and functionality. Regular updates ensure that users experience ongoing improvements, making it a valuable tool for anyone concerned about data security while utilizing AI.
For ongoing insights into AI and technology, stay tuned for more articles.